How to Select Windows 11 Home or Pro Edition During Installation

With over 9 years of experience as in IT, I have led technology operations across diverse industries, ensuring robust IT infrastructure, network security, and team development.
My expertise spans managing IT infrastructure & operations, IT policy, and backup/disaster recovery. My expertise also includes IT asset management, Google Workspace & Office 365, endpoint security, DLP, and cross-platform systems (Windows/Linux/Mac OS) etc.
Additionally, I hold certifications in Google IT Support, CCNA, and IBM Cybersecurity, reinforcing my commitment to continuous learning and delivering robust technology solutions.
Thank you for your time and consideration.
Best regards, Vishal Mathur
When performing a clean installation of Windows 11, the setup process does not normally present an option to choose the operating system edition. Instead, it automatically installs one of the available editions—Home, Pro, or Education—based on your device or license.
To force Windows Setup to display the edition selection screen, you can modify the bootable media (or ISO) by adding an EI.cfg file. This allows you to select the edition you want, such as Windows 11 Pro, during installation.
Why Doesn’t Windows 11's Setup Display the Select Edition Screen?
Microsoft no longer provides separate ISO files for different Windows editions. Instead, the default multi-edition ISO includes all versions—Home, Pro, Education, and Enterprise.
When you perform a clean installation, Windows Setup automatically detects traces of any previous installation, including the OEM (Original Equipment Manufacturer) license embedded in your computer’s motherboard. It then installs the matching edition without asking you to choose.
While this simplifies activation—since your system is activated automatically—it also removes the option to manually select the Windows 11 edition during setup.
To override this behavior, you can add a Windows Setup configuration file. This optional file forces the installer to display the edition selection screen, and can also be used to automate edition choice and product key validation during installation.
How to Force Windows Setup to Show the Windows 11 Editions During Clean Install
As discussed above, you can place a tiny ei.cfg file inside the bootable media folder to force Windows Setup to show the select edition screen during installation. Here’s how to do it.
First, you need to create a bootable Windows 11 USB drive. If you don’t have an ISO, you can download the Windows 11 ISO image from the Microsoft server.
Next, open a new Notepad file. To do this, press Win + R, type notepad, and click OK.
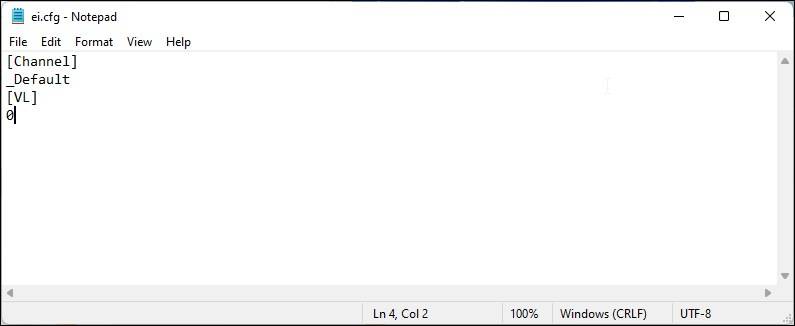
In the Notepad window, copy and paste the following lines:
 [Channel]
 _Default
 [VL]
 0
Press Ctrl + S to open the Save as dialog.
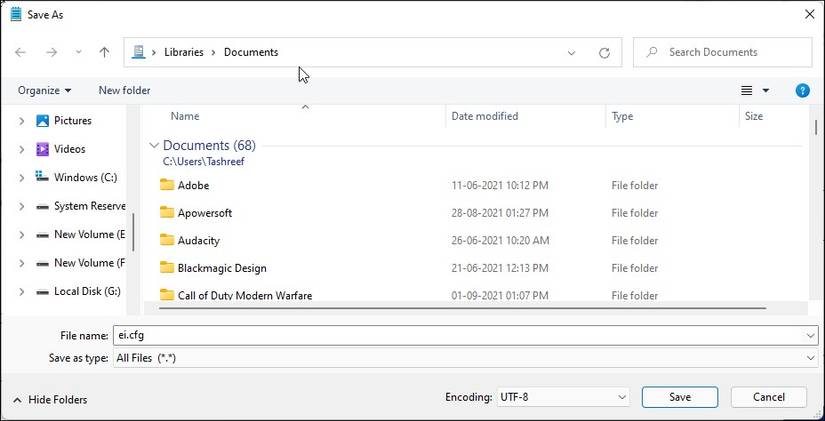
Here, type the file name as ei.cfg. Next, click the drop-down for Save as type and select All Files.
Click the Save button to save the file to your PC.
Next, connect the bootable USB flash drive to your PC.
Press Win + E to open File Explorer.
In the left pane, click on This PC.
Next, double-click on the bootable USB flash drive to view its content.
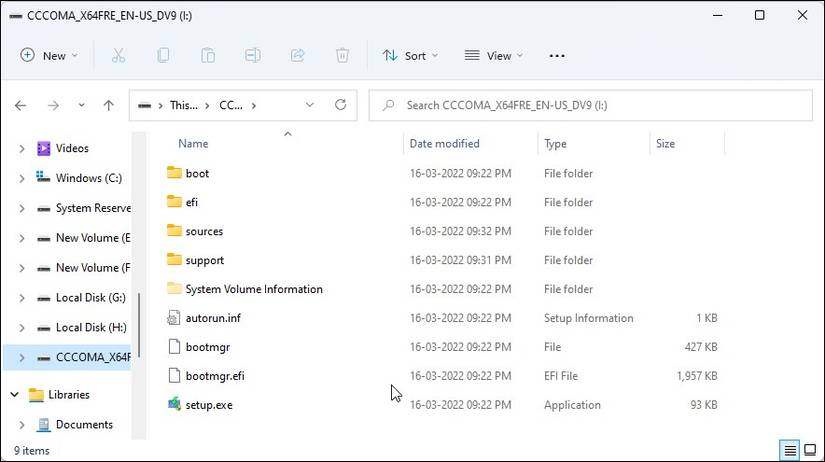
Double-click on the Sources folder to open it.
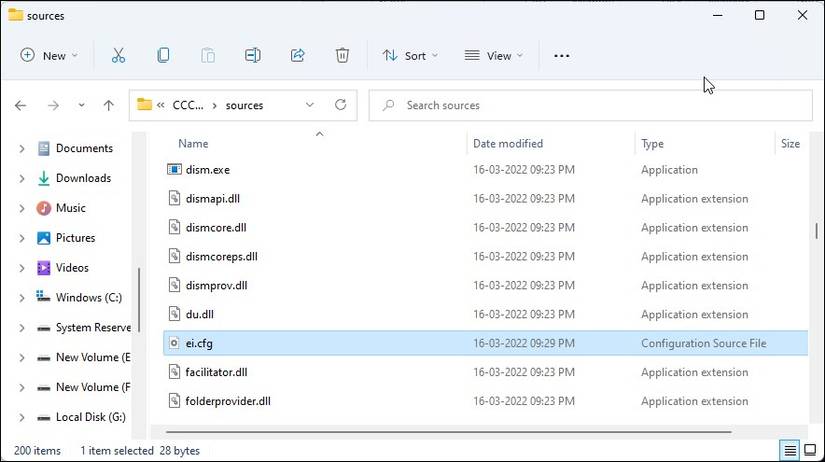
Now, copy and paste the ei.cfg file into the Sources folder.
Once done, safely eject the USB flash drive. You can now boot using the installation media and select the Windows 11 Pro, Education, or the core Home edition from Windows Setup.
Alternatively, you can also automate the edition selection process by configuring the EI.cfg file to install your preferred edition of the OS. For example, if you want Windows Setup to automatically select the Windows 11 Pro edition during installation, use the following format for the EI.cfg file.
[EditionID]
Professional
[Channel]
_Default
[VL]
0
Save the file as ei.cfg and move it to the Sources folder of your USB installation media. During installation, Windows Setup will automatically select the Windows 11 Pro edition and skip the select edition step.
Select the Pro Edition While Installing Windows 11
While the above method will allow you to install Windows 11 Pro or other editions of the OS, you are still required to have an active license for the selected edition.
If you attempt to install the Pro edition of Windows 11 on a PC that already has a Home edition license tied to it, the system will display a “not activated” message or the error code 0xc004c003 in the Settings panel. On top of that, Microsoft restricts certain customization options on devices running an inactivated copy of Windows.